Cutting Punch Holder & Bushing Assembly for the Machinery Manufacturing Industry
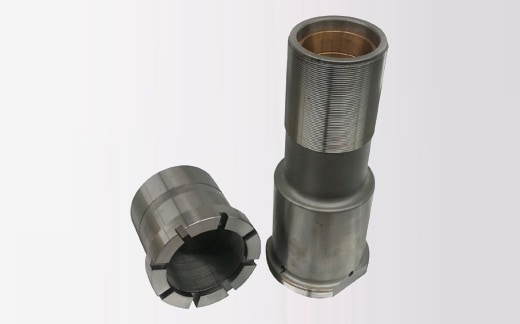
As a well-known supplier to many machinery manufacturers, at Tracey Gear & Precision Shaft we produced the cutting punch holder and bushing assembly highlighted here. With our precision machining and grinding capabilities, this customer trusted us to furnish them with a precision assembly that ensured accurate and reliable operation of their machinery.
Constructed from SAE grade steel, this cutting punch holder and bushing assembly featured assembled dimensions of 10.125” and a case hardened surface that is resistant to wear. Since the bushing parts are pressed into the cutting punch holder and then bored, it was essential to produce accurate parts for a perfect fit. Our challenge was to machine the mating surfaces absolutely in line and perfectly true and concentric. We accomplished this by leveraging the talents of our highly experienced team of machinists and through the use of some of the most advanced machining equipment available.
The assembly consisted of three components; the first is the press fit inner sleeves measuring 2.440” in length, with a 2.155” I.D., and an oil groove machined along the length of the O.D. Next is an adjustable collar, which features overall dimensions of 3.750” in length and a diameter of 3.655”. It includes various machined features including 8 milled 0.281” adjuster slots. The inside diameter requires dimensions that range from 3.04” to 2.934”, and includes a 3.000” 16-UN extra fine thread that runs almost the entire length of the I.D. The third section, which was the largest of the three, measures 9.875” in length, with an O.D. that ranged from 4.042” to 3.000”. The larger O.D. section includes a .563” length of 4-1/8” 16-UN extra fine thread and a 3.25” long section of 3.000” 16-UN extra fine thread, which would receive the previously mentioned section. The I.D. calls for various tight tolerance dimensions and had to be machined to receive two press-fit sections, which were subsequently bored.
As an ISO 9001:2015 certified company, we obtained robust quality analytics to confirm that the dimensional accuracy and surface characteristics conformed to the customer specifications. As part of our deliverable, we furnished them with a formal inspection report.
Since our founding in 1945, one aspect of our business philosophy has been to invest in top-performing machinery that enables us to manufacture parts with an exceptionally high caliber of quality. We understand what it means to have equipment that operates reliably, accurately, and consistently, so our work ethic dictates that we provide machine manufacturers with high-performing parts and assemblies for equipment that bears their company name.
If you are interested in obtaining more detailed information about this project, contact us today.


